What is WebCenter Content Presenter task Flow?
The WebCenter Portal Architecture as recommended by Oracle leverages WebCenter Content to maintain, publish and manage content. The Content Presenter task flow provided by Oracle, allows you to select an Oracle Site Studio file, a single item of content, multiple content items, query for content, or select content based on the results of a WebCenter Personalization Conductor scenario, and then select a template to render the content on a page in a WebCenter Spaces application.
Using WebCenter Content Site Studio is one of many ways to integrate content in portal (Others being Content Data Controls, REST APIs, Document Services).This document explains the basics and delves into a Proof of Concept for the same. Oracle recommends that you use Content Presenter ADF templates to integrate Site Studio and WebCenter Portal instead of Site Studio region templates.
Over all process for this POC contains below steps:
- Create Site Studio region
- Create WebCenter Content Presenter templates and views (jsff) in the WC Portal
- Add the Content presenter TF (to jspx) with CMIS query to pull the content with the region definition and feed to the Template view


WebCenter Content/UCM Set up for site studio
There are certain steps required in WebCenter Content to enable site studio integration
- Below Components MUST be enabled in WebCenter Content for site studio to work in line with portal.
- Folders_g
- DBSearchContainsOpSupport
DynamicConverter - WebCenterConfigure
- LinkManager
- Site Studio components (Site Studio, Site Studio External Applications)
- WebCenterConversions component
Please read here on how to enable these components
http://docs.oracle.com/cd/E17904_01/doc.1111/e10792/c04_components.htm#CSMSP748
- Creating Connection in JDEV:
Create the connection in JDEV as below. Use RIDC socket, and make sure Identity Propagation is enabled. RIDC port by default is 4444.

Installing Site Studio for Creating Site Studio Regions
Log in with the administrator, go to My Content Presenter and click on My Downloads. Click on the Site Studio link and install it.
If you get something like: The application has failed to start because the side-by-side configuration is incorrect. Please see the application event log for more details.
Please download and install Microsoft Visual C++ 2008 SP1 Redistributable Package (x86 or 64 depending upon the processor architecture (you can check in My Computer properties)
Now when you launch the Studio, on your local create the connection to site studio
Press the New button to open the New Connection popup:

Specify the server CGI URL. If you have installed UCM locally, the URL should be something like this: http://mycontentserver:port/cs/idcplg. The port is the port at which your content server runs e.g 16200
Create a new site to store all Portal material so press New next to the Site Label dropdown list.
E.g. for Employee write Employee.
Step 1 Create Site Studio region
Create Elements
A region in site studio could have many types of elements depending upon content e.g. a News Item could have a Title, Description, Text, Image etc.
Launch the site studio from the windows.
In the site that you create (e.g Employee) Select the Element Definitions à New
Here we have different types of elements.
For this POC we will select a plain text and a Wysiwyg . Element which allows HTML to be published.

Select the plain text, you can see you will get a below.
Specify the ContentId. E.g ID for element can start with E_XX
Give the Title as below and Click Assign Info. You will this in the Element Definitions
Select the Type as Type:(Required:) System – System configuration, templates, settings

Similarly create a new Wysiwyg for News Description

Create Region Definition
In Site Studio select Region Definitions from the Site Assets.
Press the create new button and select Region Definition:

Give Metadata as below:

Add elements to the region:
Once assigned the information the region should appear in the list. Right click on it and select edit. This opens the popup that allows us to assign the elements. Press the Add button.
Here we specify the Content ID the we can reference from our template in WebCenter.
Specify a name, label and select the element.

Similarly Add the Description and we are done creating a site studio REGION 🙂

Now that we are done with the Site Studio Templates, we are going to create the WebCenter Content Presenter Templates in the JDeveloper WebCenter Portal.
See the next section.
Step2 Create WebCenter Content Presenter templates
List Item template
We will now create a List Item Template. Depending on your needs, the approach you take to defining Content Presenter display templates will vary. Typically, you define display templates for specific single items of content, then define a multiple content item display template that includes calls to the single item display templates. Examples of single content items for which you may want to create Content Presenter display templates are:
- Individual items to display with a specific look and feel on a page.
- Different views of a specific type of item (such as short and detailed views of an article).
- Different versions of a similar item (such as Press Releases that may be formatted differently for different groups, using a different set of properties).
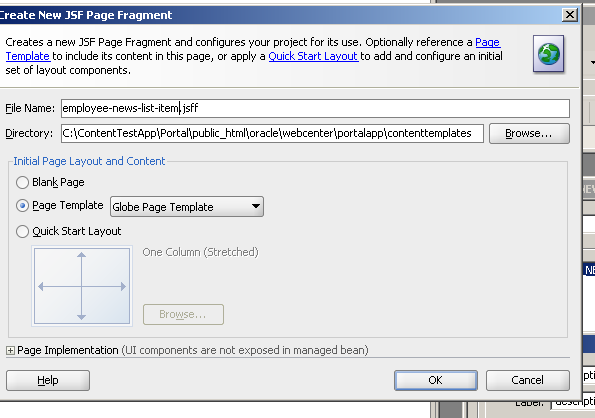
Create a fragment as below
<?xmlversion = ‘1.0’?>
- <jsp:rootxmlns:jsp=”http://java.sun.com/JSP/Page” version=”2.1″
- xmlns:af=”http://xmlns.oracle.com/adf/faces/rich”
- xmlns:dt=”http://xmlns.oracle.com/webcenter/content/templates”>
- <dt:contentTemplateDefvar=”node”>
- <af:panelGroupLayout layout=”vertical” id=”pgl3″>
- <af:panelGroupLayout layout=”horizontal” valign=”top” id=”pgl4″>
- <af:outputText value=”#{node.propertyMap[‘RD_EMPLOYEE_NEWS:title’].asTextHtml}”
- id=”ot4″ escape=”true”
- inlineStyle=”font-size:14px; font-weight:bold;”/>
- </af:panelGroupLayout>
- <af:panelGroupLayoutlayout=”horizontal” valign=”top” id=”pgl5″>
- <af:outputText value=”#{node.propertyMap[‘RD_EMPLOYEE_NEWS:description’].asTextHtml}”
- escape=”false” id=”ot5″/>
- </af:panelGroupLayout>
- </af:panelGroupLayout>
- </dt:contentTemplateDef>
- </jsp:root>
The line 5 is important here. We have used the content template definition which specifies the definition of the template.
This tells the template that it will be a single node template. The var represents the actual content that contains all the metadata of the content. That node contains a properyMap with all the metadata. This can be accessed by providing the name of the metadata field. In order to retreive the actual content of the data file from Site Studio we need to provide the name of the region definition and the field of the definition so node.propertyMap[‘RD_EMPLOYEE_NEWS:title’] will return the content of the title field from the RD_TRAINING region definition.
This is a standard way of accessing a region and an element within a region.
Now we need to create a portal resource. Right click the file and select Create a Portal Resource
Give the View ID. It’s very Important as it will be used to refer the content template within the list template Definition while iterating.

Now we will create a List Template
List Template

- <?xmlversion = ‘1.0’?>
- <jsp:rootxmlns:jsp=”http://java.sun.com/JSP/Page” version=”2.1″
- xmlns:af=”http://xmlns.oracle.com/adf/faces/rich”
- xmlns:dt=”http://xmlns.oracle.com/webcenter/content/templates”
- xmlns:f=”http://java.sun.com/jsf/core”>
- <dt:contentListTemplateDefvar=”nodes”>
- <af:panelGroupLayout layout=”vertical” id=”list” valign=”top”>
- <af:iterator var=”node” value=”#{nodes}”>
- </af:iterator>
- <f:facet name=”separator”>
- <af:spacer id=”sp1″ height=”10px”/>
- </f:facet>
- </af:panelGroupLayout>
- </dt:contentListTemplateDef>
- </jsp:root>
- <dt:contentTemplate node=”#{node}” view=”employeenewslistitem”
- nodesHint=”#{nodes}” id=” employeenewslist”/>
This code is also quite straight forward. In the beginning we tell the template that it will be multi node template by using:
- <dt:contentListTemplateDef var=”nodes”>
We use an iterator to loop all the nodes passed to the template by the content presenter.
Then we referencing another template is done by using following code:
- <dt:contentTemplate node=”#{node}” view=”employeenewslistitem “
- nodesHint=”#{nodes}” id=” employeenewslist”/>
We pass the actual node to it and the view attribute should hold the value specified in the View ID attribute from the portal resource.
Also create a portal resource from that template and call it employeenewslist:

Step3 Adding content presenter task flow and a page
Now that we have built the SS templates and the CP templates, we will add a CP task flow.
Create a jspx file that will render the content via the templates and the taskflow

Drag and drop the content presenter on the content facet and select Region from the context menu.
Specify following parameters to the taskflow

- taskflowInstId: this you can choose. It should be unique within the page.
- dataSourceType: ${‘dsTypeQueryExpression’} this tells the content presenter that the datasource will be a query.
- datasource: ${‘SELECT * FROM ora:t:IDC:GlobalProfile WHERE ora:p:xRegionDefinition LIKE \’RD_EMPLOYEE_NEWS\’ order by ora:p:dCreateDate asc’} This query is a CMIS query. This query will return all content where the xRegionDefinition contains RD_EMPLOYEE_NEWS. Note there is an order by clause for the create date. This needs to a sortable field in WebCenter Content/UCM. You can do this by going to the admin applets as below.
- templateView: ${’employeenewslist’}This is the value specified in the View ID of the second template (when we created the portal resource. This way we tell the content presenter to use that specific template.
- <dt:contentTemplate node=”#{node}” view=”employeenewslistitem “
- nodesHint=”#{nodes}” id=”employeenewslist”/>

- <?xmlversion=’1.0′ encoding=’UTF-8′?>
- <jsp:rootxmlns:jsp=”http://java.sun.com/JSP/Page” version=”2.1″
- xmlns:f=”http://java.sun.com/jsf/core”
- xmlns:h=”http://java.sun.com/jsf/html”
- xmlns:af=”http://xmlns.oracle.com/adf/faces/rich”>
- <jsp:directive.page contentType=”text/html;charset=UTF-8″/>
- <f:view>
- <af:document id=”d1″>
- <af:form id=”f1″ usesUpload=”true”>
- <af:pageTemplate value=”#{bindings.pageTemplateBinding.templateModel}”id=”pt1″>
- <f:facet name=”content”>
- <af:panelGroupLayout id=”pnl” layout=”vertical”>
- <af:goLink id=”create” destination=”http://mycontentserver:port/cs/resources/wcm/custom/sitestudio/contentwizard/webcenter/contentwizard.hcsp?dDocType=Document&cpRegDef=RD_EMPLOYEE_NEWS&dSecurityGroup=Public&cpIframe=true&forceLogin=1″
- targetFrame=”_blank” text=”Create New”/>
- <af:region value=”#{bindings.doclibcontentpresenter1.regionModel}”
- id=”r1″/>
- </af:panelGroupLayout>
- </f:facet>
- </af:pageTemplate>
- </af:form>
- </af:document>
- </f:view>
- </jsp:root>
Link to Site studio to open up
Note that we have added a link to site studio to be able to create the news items from the portal. This will open the site stuio from the WebCenter Content
Note the parameters here, we are passing the Referenec to the region definition.
Add the Page to navigation
This is straight forward. Add the page to the pages.xml to be shown in the menu.

When you click the Create New you will be asked to logon. This is because we do not have the SSO between the Portal and the Content
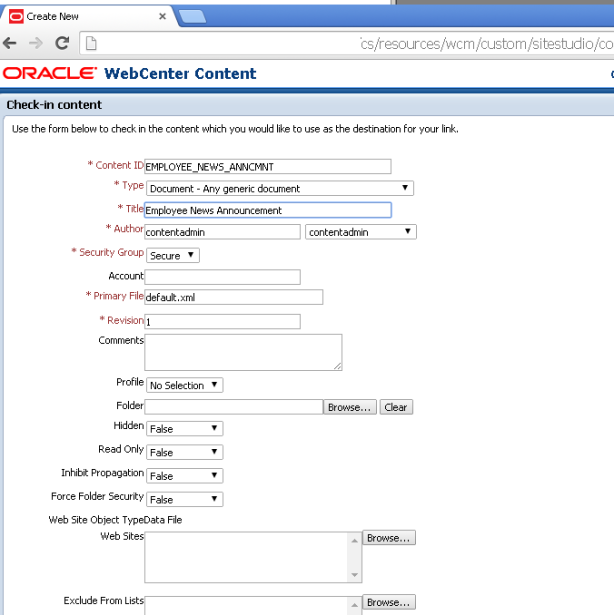
Choose New Contributor Data File

This will load the Content metadata check in form. Imagine I am creating content for announcement. Enter details as shown for Content id and Title
Click next and select “Edit Item Now”

This will load the site studio for creating the item. Fill in the details and click Save and Close

Note- if the window does not close you can use the X on browser
Come back and refresh the screen on the portal as below
You will see the content

Security Considerations
- WebCenter Portal and Content MUST share same LDAP/ Authentication source
- For public content users will be able to see the content even if not local/global content user but for performing content editing user would need to be mapped
- All users are authenticated through external security and are considered external Content Server users. The first time users log in to the Content Server system through Oracle WebLogic Server, they are added to the Content Server database, and administrators can view the external user information through the Repository Manager. External users are not automatically included in Content Server user lists, such as the Author field on a content Check In page.
- You can make the users local or global and create Roles and Accounts with Permissions to control security
- Additional we need to explore the use of Credential Mapping to map the external roles to content server roles.
Please read more here:
http://docs.oracle.com/cd/E23943_01/doc.1111/e10792/c05_security.htm#CDDJAAJB
http://docs.oracle.com/cd/E23943_01/doc.1111/e10792/c05_security.htm#BGBEDJFI
google-site-verification: google97481851e41a08b7.html
